

Ultimate Guide to CSS Positions

A integral part of being a successful web developer is grasping the basics but yet fundamentals. Namely, how to place elements on the web page or even more complex seemingly how to place items in relation to one another.
As a designer, we often have to look at items in relation to one another and how the hierarchy of elements visually flow together. Fast forward to the coding and an extra level of complexity gets thrown in as the "canvas" suddenly needs to be entirely adaptable for different screen sizes, accessibility and a myriad of other factors.
In this article we will focus on the CSS position property and how it works.

What are the CSS position properties?
The CSS position property defines how the element is positioned within the document. Using left, right, top, bottom and z-index properties to determine the final position of an element on a page.
In order to know which position property to utilize within our CSS code, we have to understand how many properties exist and what each properties use cases are.
There are 5 values the position property value can take:
Static
Relative
Absolute
Fixed
Sticky
Let's check it out with some use cases.
1. Static
The default or "normal" positioning is the static position. As a result, the contents inside the backpack assume a default position if it is packed without being thoroughly organized.
If three elements are added to a web page with static positioning, the page's natural flow will be disrupted. Therefore, it won't matter if the top, right, bottom, left, or z-index properties are changed.
Let's fill your backpack with a few things and examine how it would appear in a static state.

The items in the backpack are arranged one after the other in the image above. This is because the position value of each item has been set to static, which is the default value. It is arranged automatically in accordance with the normal flow.
Let us now discuss relative positioning.
2. Relative
Your item will move relative to its current position if you use relative positioning. If you want to move your water bottle next to the lunch box, for example, you must assign the position as relative and provide relevant values to move next to the lunch box.
When you move the bottle next to the lunchbox, the position it previously occupied is empty because the pencil case did not take that spot simply because the bottle was moved.
The bottle has been moved next to the lunch box in the image below, but the original space remains.
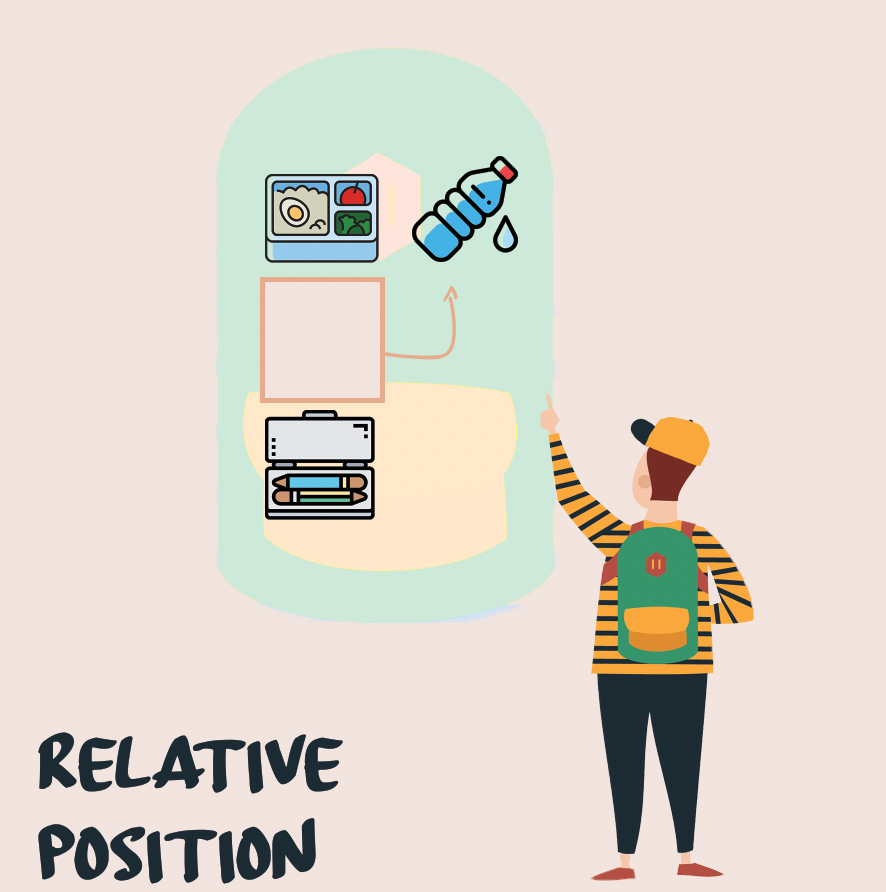
When you change the position of a relative element, the original space of that element is not removed from the normal flow.
3. Absolute
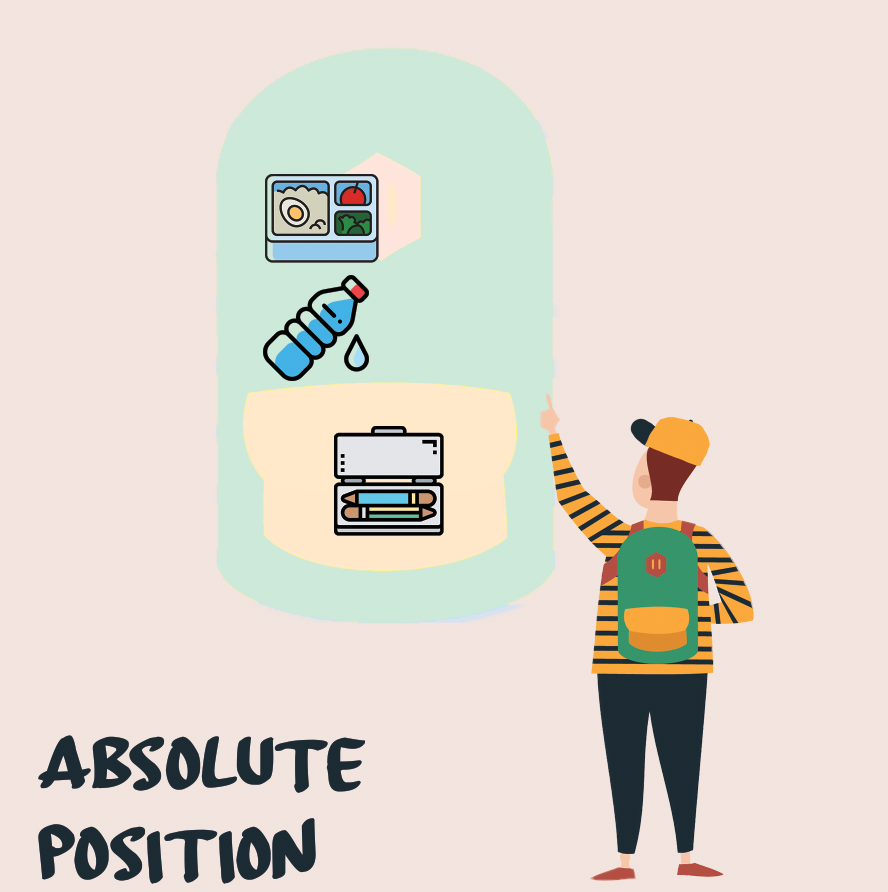
This is a difficult situation to explain with our example. Assume you want to store your water bottle in the backpack's pocket. If this is the case, this pocket should already have a relative or any other position other than static position assigned to it. As a result, we can precisely position it inside the pocket. And this position is determined by the pocket.
If the pocket has no other position than static and there are no other nearby items or places with a non-static position, it will move to the backpack's top right corner. That is, it will first position itself relative to the backpack before assigning an absolute position based on where you want it to go.
Simply put, for the absolute position to work, the parent element must have a position property value other than static. If no elements with position property values are found, the element will be positioned relative to the viewport.
When you assign an element an absolute position, it removes it from the normal flow; the space that the element previously occupied is no longer there.
Look at the image below. Your water bottle now has a permanent place inside the pocket. Also, the pencil case has taken the place of your bottle.
4. Fixed
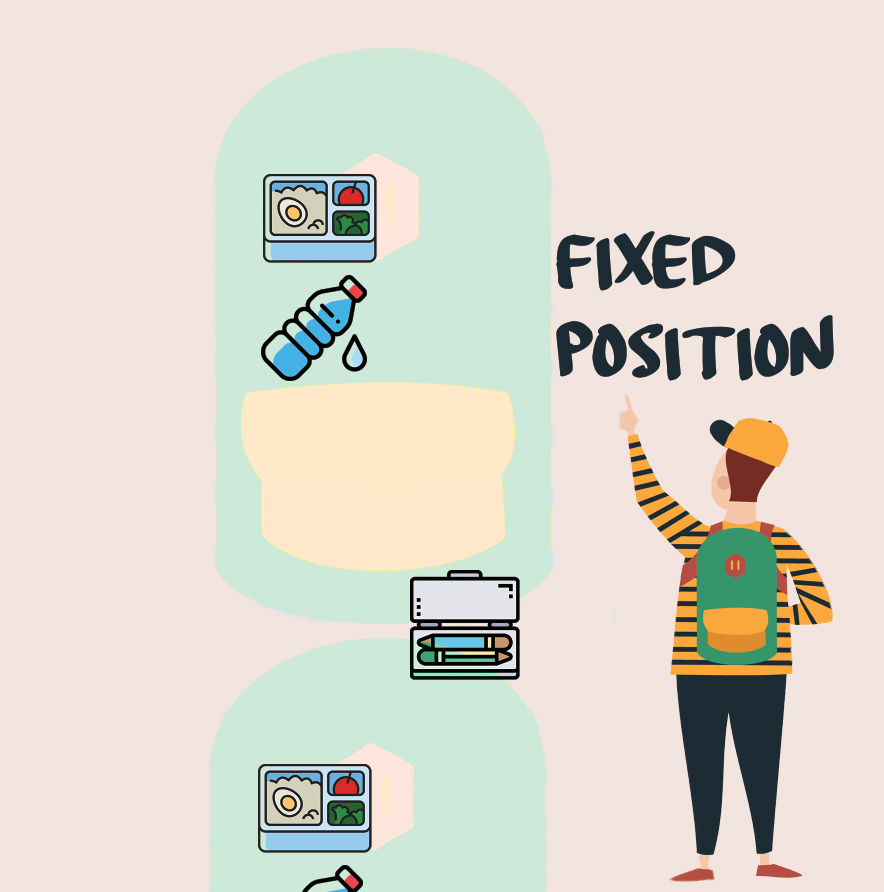
Fixed positioning entails placing your items wherever you want, regardless of whether or not there are other items in that location. So, say you moved your bottle to the right side, as shown in the image below; if there is another book there, you can still place it over there and decide whether you want it on top of or under the other item.
When you assign a fixed position to an element, it also removes it from the normal flow. It is also positioned in relation to the viewport. As a result, when you scroll the page, the element remains in its original position.
5. Sticky
This is also a difficult situation to explain using this example. To explain this, I must once again scroll your backpack and treat it as a flat surface.
As the name implies, you stick your item into a specific location. So, for example, if you place your bottle on top of your backpack, it will remain in that position when you scroll up and down the backpacks.
Sticky position behavior is a mix of relative and fixed positions. Simply put, it will act as a fixed position inside the backpack and will not move. However, when you scroll to the second backpack, it remains attached to the first and moves relative to it.
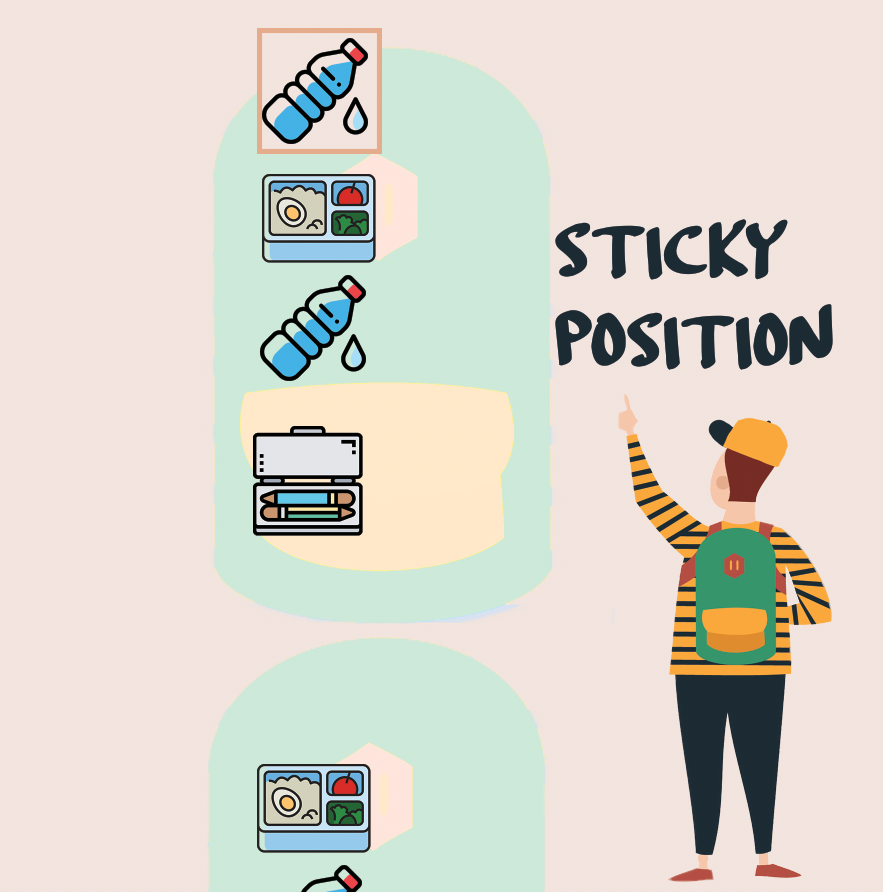
Have you noticed how it adheres to the top of the backpack when it moves?
Alright, I hope you understand the various position property values and how they behave.
When working with positioning, there is one more concept that you must understand. This is the z-index. Let's find out what it's all about.
z-index
Did you notice what happened when we gave your water bottle a fixed position and moved it to the right side, on top of the book? How did we get it to the front of the book?
This is where the Z-index comes into play. When elements overlap, we use the Z-index to stack them.
Assume you have a stack of books that you need to stack. So you assign a number to each and stack them one by one. The highest number is at the top of the pile, and the lowest number is at the bottom.
The Z-index allows you to stack the elements similarly to how we stack these books. The z-index property can be used by any element that has a position value other than the static position.
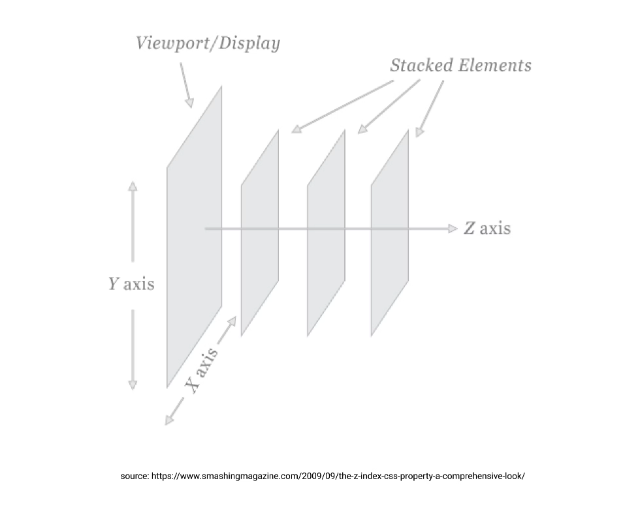
The z-index allows you to specify how and in what order the elements should overlap. If you increase the z-index value, the element will appear closer to the viewer. In other words, it will be displayed above the other elements.
Thanks for learning with me!


